You can download the Ventrilo client on the download page located at http://www.ventrilo.com/download.php. You can also find a Setup guide and more information on the Ventrilo site located at http://www.ventrilo.com/setup.php
After Downloading and installing the Ventrilo client you will need to take a few steps before connecting to a server. First you will need to know:
- The Hostname or IP address of the server you are trying to connect to. You will receive this information if you are a VentShop.net customer, or you can get this information from the server owner.
- The port number that the server you are trying to connect to is using. This is necessary because there is many different possibilities other than the default port of 3784 that the server is using. Again you can get this information from the server owner or if you are a VentShop.net customer you will receive this information in an e-mail.
- The server's case sensitive password. By default our servers will not need a password unless the server owner has set one.
Once you have all the required information you can begin to setup the Ventrilo client. Should you come across any problems or questions click on the help button on the Ventrilo client program or go to the Ventrilo.com FAQ page. If you are still having problems go to our Support Forum.
- Start the Ventrilo program: Click Start, All Programs, Ventrilo, then click Ventrilo.
- Click on the
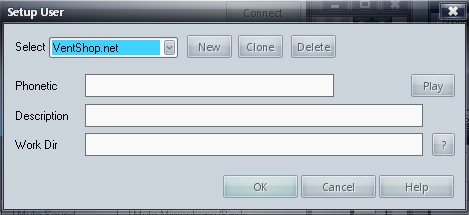
 button Next to the pull down menu called "User Name". This will open
a window where you can setup a logon name, as well as set a phonetic, and
a description. See picture 2 on the right.
button Next to the pull down menu called "User Name". This will open
a window where you can setup a logon name, as well as set a phonetic, and
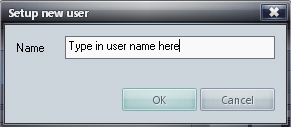
a description. See picture 2 on the right. - Click on the "New" button this will open a small window where you can put in a username, Use something simple like your name or the name that you use in game. Special characters like *, {, =, etc are not recommended because Ventrilo will announce these characters as Asterisk, Left Curly Bracket, Equals, etc which can be very annoying to other users. See picture 3 on the right
- Then click on OK, you can create other usernames or clone this one and give it a different name at another time. Also click ok on the setup user window.
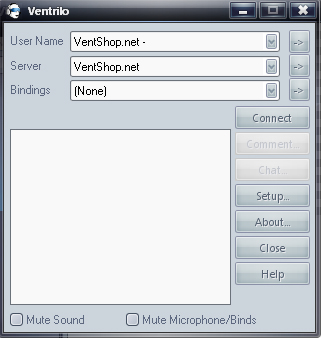
- You should be back on the Main window like picture 1 on the right of
this page. Now click on the
button next to the
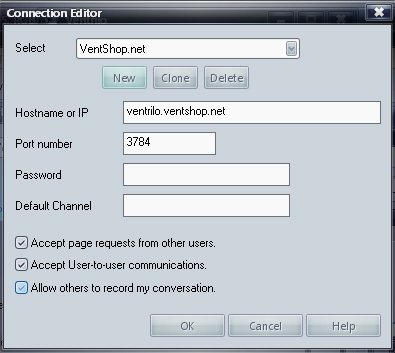
server pull down menu. You will then have the connection editor window
come up like what is in picture 4 on the right.
- Click on New and give your connection a name the actual name isn't important but should be something that you can easily remember will connect to this particular server. Then Click on OK. After that enter the Hostname and Port number in the fields like in picture 4, these will be unique to your server. You can setup multiple servers so that you can easily disconnect from one and connect to another.
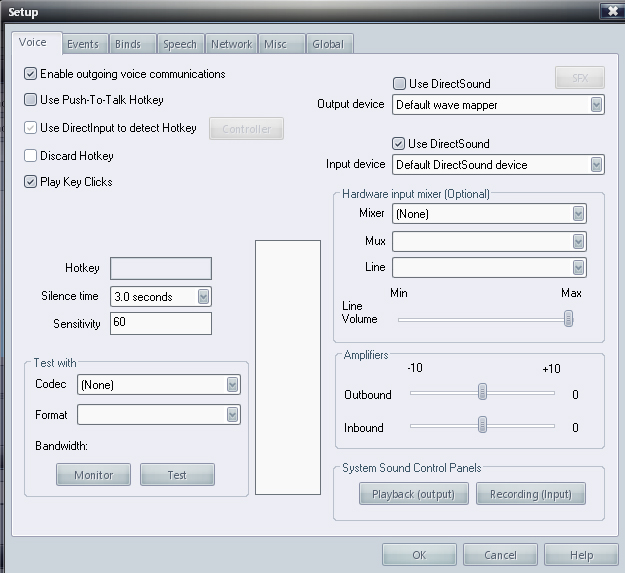
- Finally click ok and you should be back to picture 1 again. Now click on Setup so that you can set your audio options for Ventrilo. You can see this screen in picture 5.
- One of the options that you may be asked to adjust is your Outbound, this raises or lowers the volume of your voice when you broadcast to the server and will effect how people hear you. some microphones pickup sound better than others. Another setting you may need to adjust is the inbound, if it seems that everyone in the server seem loud or soft to you, you can adjust this slider to help alleviate these problems .
- Now click on Monitor and you will begin to see numbers show up in the tall rectangular box, these numbers will help you adjust your sensitivity if you choose to have your system auto broadcast, you may choose to use push-to-talk if you broadcast often or would like a bit more control.
- Finally click Apply and OK, you should now be on the main program screen again. Click Connect and you should connect to the server, if there is anyone else connected to the server you will be able to see them and converse with them in real time.
At any time you can add or remove connections or setup different usernames incase a friend comes over or you have other family members who use Ventrilo as well.

Picture 1
Picture 2
Picture 3
Picture 4
Picture 5